
Monday, October 25, 2010
Sunday, October 24, 2010
Creepy Halloween Pic

Just a little something for Halloween :) It was relatively easy to make and fun at the same time. I had to put on quite a lot of ghoulish looking make up to get the effect, then for the rest I messed with the lighting and I made good use of the burn tool and the blur tool. For the eyes all I did was go over them with a brush tool and blurred them some more. The only thing I don't like is the text, it's a little hard to see but overall I'm kind of happy with how this turned out.
Wednesday, October 20, 2010

Monday, October 18, 2010

Friday, October 15, 2010
Flowers

I some-what used a tutorial as a guide-line for this pic, like with the lighting and the way the brushes were used. I didn't want to copy it completely, so i just took bits and pieces of useful information to create my own original photo. This is the tutorial i used http://photoshoptutorials.ws/photoshop-tutorials/photo-effects/fashion-watercolor-artwork/Page-2.html
Wednesday, October 13, 2010
Pop Art
Sunday, October 10, 2010
Grunge Rock
I took another one of my friends pics and selected the head and shoulders with the magic wand tool, then I made a copy of the selected area and made a dark blue fill layer. I posturized the edges and changed the color tones to blue, then I placed a grungy backgound and downloaded some grunge-sketch brushes. I also added some text at the bottom that I downloaded.
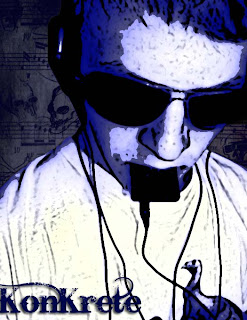
KonKrete

I took one of my friends pictures and selected the area around his head with the magic wand tool, then I made a copy of what was selected and I made a gradiant layer for the background I chose a light blue and a dark blue and used the "Pen sketch" option for the background. On the gradiant layer I used some ink splatter brushes. I posturized the face a bit and I used the noise option to distort it just a little. I then downloaded the text you see at the bottom and placed it in the corner of the pic.
Creepy vampire
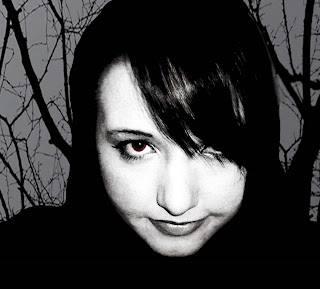
To get into the October/Halloween spirit I made a dark, sinister looking vampire picture. I used the magic wand tool to select the head and shoulders, then I made a copy of what I selected. I inserted a blank layer where I placed the black trees. I made the tree background darker, and I added another layer and made the face black and white, then I selected the eye with the magnetic lasso tool and made it red. I used the burn tool to make the area under the eye-brow darker, and the lips a little darker, then I went into the filters option and clicked "Lighting Options" and changed the shadowing and lighting a little to give it a more eerie effect.
Friday, October 8, 2010
Neon color

I used one of my old pictures and downloaded some ink splatter brushes and some random other brushes to start. Then, I selected the head and shoulders area of the picture and created a copy of the area selected, then I filled in the original layer with dark grey. In the filled layer I added a bunch of splatter brushes so I wouldn't get too many on the face, then I added some splatter brushes on the copy layer. I created another layer for the text in the corner, and another to add more brushes. I chose the screen mode for blending the layers. I also selected the eyes and used the color adjustment option to give them that aqua green look.
Wednesday, October 6, 2010
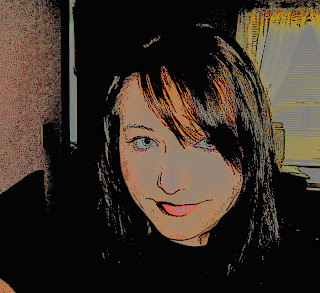
Black and white w/some color

I took one of of my old photos and turned it black and white, then I added a duplicate layer and after setting the opacity to a low level I used the eraser tool on the eyes and the hair.
Friday, October 1, 2010
Anime Girl

I took one of my colored drawings and boosted the lightness and the saturation, then I used the magic wand tool and the magnetic lasso tool to select different parts to bring out the color and make it appear smoother, such as the eyes and face. I used the blur tool and the blending tool to even out the skin tone and to fix the background, too. I also experimented with the color levels on her hat and her lips.
Two faced
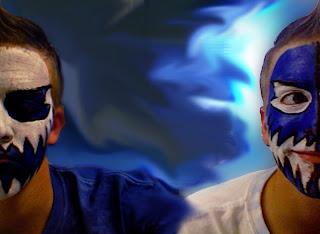
I opened a new picture in photoshop, then I placed both pictures (which ARE the same person) on the blank picture and selected the background and used the smudge tool to create the weird effect. Then I changed the colors for both sides by experimenting with the color levels and saturation. I made the side of the face that's frowning darker, and the side that's smiling lighter by working on their separate layers.
Subscribe to:
Comments (Atom)